Last updated November 16, 2026








Free written scope consultation - allowances, timeline, and change-order rules on paper before a single trade is scheduled
Bathroom Remodeling Maintenance Schedule: What to Do and When
Silicone caulk around a tub surround has a functional life of 3 – 5 years. Most homeowners don’t touch it until they see water damage that runs $1,500 – $4,000 to repair. The fix that prevents all of it is a $12 tube of silicone and a 20-minute calendar reminder you’ll actually keep. A bathroom remodel’s lifespan is decided less by the materials you picked and more by what happens in the first 24 months after the crew leaves. This guide gives you a task-by-task, month-by-month maintenance schedule tied to specific product categories, with Glendale conditions factored in, so nothing gets skipped because it seemed like somebody else’s job.
Quick Answer
Bathroom remodel maintenance follows three zones on three different clocks: silicone caulk at joints and seams every 3 – 5 years (check it every 6 months), cement-based grout sealed once a year and deep-cleaned every 6 months, and mechanical parts, meaning exhaust fan, supply lines, and valve cartridges, inspected every 6 months and replaced when the first sign of wear appears. In the first year after a remodel, the highest-priority tasks are a 30-day caulk and grout check, a 6-month exhaust fan airflow test, and a 12-month valve and supply-line inspection. Everything after that is on a predictable cycle you can log and repeat.
Styles & brands we work with
- Kitchen remodeling
- Bathroom remodeling
- Home additions & ADU
- Roofing
- Windows & doors
- Driveway & pavers
- Fence
Table of Contents
- The First 30 Days: What to Check Before the Dust Settles
- Months 2 – 6: Grout, Caulk, and the Early Warning Signs
- Month 6: The Exhaust Fan Airflow Test
- Month 12: Valve and Supply Line Inspection
- Re-Caulking and Re-Grouting Intervals by Material Type
- Glendale Climate Factors That Change the Schedule
- How to Log Maintenance So It Protects Your Warranty
- Year Two and Beyond: The Long-Term Cycle
The First 30 Days: What to Check Before the Dust Settles
The first month after a bathroom remodel is when settling, curing, and small installation issues surface. Grout shrinks as it cures. Silicone that was applied over a damp substrate can lift at an edge. A supply line fitting that was tightened by hand can weep a single drop under pressure. None of those are a problem if you catch them in the first 30 days. All of them become expensive if you don’t.
Here’s the month-one checklist we hand to clients after a bathroom remodel in Glendale:
- Day 3: Run the shower for 10 minutes and look at every caulk seam at eye level. Any gap, bubble, or dark line means the bead didn’t bond. Note it before it’s had time to grow.
- Day 7: Wipe the grout lines with a dry paper towel. Chalky residue lifting off means efflorescence, which is normal in the first week. Sand-textured grout that crumbles means the mix was wrong.
- Day 14: Look under every sink with a flashlight. Trace each supply line from the shutoff valve to the fixture body. Any mineral crust or drop at a fitting gets reported.
- Day 30: Run the exhaust fan for 15 minutes, then check for condensation on the mirror and window. If moisture is still beading on surfaces after 15 minutes, airflow is inadequate.
Under the 365-Day Done Right Promise, any of those issues reported in the first year is our responsibility to correct, not yours. That’s the point of the first-30-day pass: it starts a documented record. Every Rowan visit includes a photo record as a standard deliverable, so you have dated images of the bathroom at handover and can compare them to what you see at day 30.
Months 2 – 6: Grout, Caulk, and the Early Warning Signs
Between months two and six, the bathroom stops settling and starts living. This is when you learn whether the substrate prep was done correctly. In our experience with Glendale remodels, most early failures show up here, and they fall into three categories.
Grout color shift. A grout line that goes from uniform to mottled in six months is absorbing water. Cement-based grout is porous even after sealing, and in a shower that gets daily use, water finds the weak spots. Look at the floor corner where the shower meets the wall – that’s where it starts.
Caulk adhesion loss. Silicone either sticks or it doesn’t. Run a fingernail along the seam at the tub and tile. If the caulk lifts or rolls, the substrate was dirty when it was applied, and it will not re-bond no matter how many times you press it back.
Paint failure at the drywall. Bathroom paint on the wall outside the wet zone should hold for years. If you see bubbling or peeling within six months, the exhaust fan isn’t moving enough air, and the moisture is settling on the coldest surface.
What to do at the 6-month mark
- Re-seal cement-based grout with an impregnating sealer. One coat, wiped dry after 10 minutes. This is the single most effective preventive task in the whole schedule.
- Check every caulk seam, including the interior corners of the shower niche. Recault any seam that shows lift, cracking, or discoloration.
- Clean the exhaust fan grille. Dust on the grille cuts airflow by 15 – 30% depending on how much builds up.
- Test both GFCI outlets in the bathroom using the test button. If either doesn’t trip, call an electrician. This is a code requirement in Glendale and worth checking every six months.
Month 6: The Exhaust Fan Airflow Test
The exhaust fan is the most under-maintained component in any bathroom. It runs silently until it doesn’t, and by the time a homeowner notices, the wall behind the tile has been absorbing moisture for a year. The building code standard is 50 CFM intermittent or 20 CFM continuous for a standard bathroom, and 100 CFM for a bathroom with a jetted tub. Most builder-grade fans installed in Glendale homes fall short of that within 6 – 8 years.
The single-tissue test
You can measure whether your fan is doing its job with one piece of toilet paper and 60 seconds. Here’s the procedure:
- Turn the fan on and let it run for two minutes.
- Hold a single square of toilet paper flat against the fan grille, off-center by about two inches.
- Release the paper. If the fan holds it against the grille for at least five seconds, airflow is adequate. If the paper falls away in under two seconds, airflow is weak.
- Repeat on the opposite side of the grille. If one side holds and the other doesn’t, the fan blade is likely dirty or the duct has a kink or a crushed section.
A weak result doesn’t always mean a new fan. Pull the grille, vacuum the blades, and check that the duct damper flaps open freely. If airflow is still weak after cleaning, the duct likely runs through unconditioned space or is undersized, which is a common issue in older Glendale housing stock where fans were retrofit into walls rather than planned at construction. If you’re near a full replacement, the venting configuration matters more than the CFM sticker, and we’ll size it correctly on the estimate. Our technicians have up to 19 years of experience running exactly this kind of venting audit.
If you’re also planning exterior work that affects how moisture leaves the house, our guide to Rowan Construction Group Glendale home covers how we approach whole-property drainage and ventilation planning.
Month 12: Valve and Supply Line Inspection
The plumbing behind your wall doesn’t need to be touched every month, but at the 12-month mark it deserves a careful inspection. This is where we see the most expensive failures: a braided supply line that fails under a sink at 3 a.m. can dump 30 gallons before anyone notices. The repair is often $1,500 – $4,000 once drywall and flooring are involved.
What to look at, and what’s actually a warning
- Braided stainless supply lines. Look for fraying at the crimped ends. A single loose wire means the braid is failing. Replace it, don’t wait. These lines have a 5 – 8 year life and should be replaced proactively, not reactively.
- Shutoff valve packing. A drop of water on the valve stem after you turn the valve is normal for older compression valves; a steady bead or a drip that runs after you’ve tightened the packing nut is not. Call a plumber.
- Corrosion on the valve body. Green crust (copper oxidation) or white powder (galvanic corrosion) on the valve union means a fitting is beginning to fail. It’s not normal aging. It’s a warning.
- Torque-off feeling. When you turn a shutoff valve handle and it feels soft or keeps turning past the stop, the internal cartridge has failed. A shutoff that won’t stop water is worse than no shutoff. Have it replaced during a routine visit, not during an emergency.
- Toilet tank refill. A running toilet is usually a 90-cent flapper, but if the refill valve is slow or the fill tube sprays, that’s a $20 cartridge, and the tank should be inspected at 12 months regardless.
- Shower valve trim. Kohler and Toto trim cartridges are intended to be replaced at 10 – 15 years, and the seal behind the escutcheon plate is a common source of slow leaks into the wall. If the plate feels loose when you press it, the seal is likely compromised.
Log the date of the inspection in your maintenance record. If you call a plumber later for a repair, having the log gives them a starting point. Under the Haven Standard, we photograph every visit, so a valve inspection from us comes with dated images of each fitting. That’s the evidence you and any future contractor need to price the work correctly.
Re-Caulking and Re-Grouting Intervals by Material Type
“Caulk and grout” is not one thing. The replacement interval depends on which product is on your wall, and getting it wrong ruins the surrounding surface fast. Use this table as your reference.
- Silicone caulk (100% silicone, at tub and shower seams): 3 – 5 years. Inspect every 6 months. Replace when it lifts, cracks, or discolors.
- Acrylic/latex caulk (paintable, at drywall corners): 2 – 3 years. Repaint over when it fails.
- Cement-based sanded grout (floors and shower pans): Re-seal every 12 months; inspect every 6 months. Replace at 15 – 20 years if it has developed cracks from substrate movement.
- Cement-based unsanded grout (wall tile): Re-seal every 12 – 18 months. Replace at 20+ years unless cracking appears.
- Epoxy grout (shower floors, wet zones, high-use): No sealing required. Inspect every 12 months. Replace at 25 – 30 years, and only if the joint has failed.
- Grout booster/sealer blend (one-step mixes): 3 – 5 years before re-sealing. The sealer is what fails first, not the grout.
In Glendale, the biggest cause of grout failure isn’t age. It’s water sitting in the joint after a shower because the fan isn’t pulling enough moisture. Fix airflow first, and the grout lasts longer. Fix grout first, and you’ll be back in the joint in two years.
Glendale Climate Factors That Change the Schedule
Glendale’s annual weather is mild compared with much of Southern California. It doesn’t freeze, doesn’t get the summer humidity of coastal neighborhoods, and interior bathrooms stay comfortably dry nine months of the year. That’s the good news. The issue is the two-to-three week span of hot, dry Santa Ana conditions that hit Glendale in fall and winter.
During a Santa Ana event, indoor relative humidity drops to 15 – 20%, and the drywall, wood framing, and grout around a bathroom all lose moisture quickly. Rapid drying through cold/dry cycling is what cracks cement grout and opens seams between the wall and the floor. This is why we recommend the grout re-seal in September or early October, before the Santa Anas hit, rather than in spring. A freshly sealed joint tolerates the dry cycle better.
Glendale neighborhoods that sit against the Verdugo foothills, including the Chevy Chase Canyon area and the streets above Brand Park, also see wide swings between cool overnight air and warm afternoon air. That cycling is subtle but cumulative. Homes in these areas do best with continuous-operation fans set to 20 CFM and a low-noise blade, priced into the estimate up front.
How to Log Maintenance So It Protects Your Warranty
Maintenance records do two things: they protect your workmanship warranty when a dispute comes up, and they help a future contractor price any repair accurately, which keeps the number honest. Here’s the log we hand to clients. It’s simple on purpose, because a log you don’t fill out is useless.
- One row per task, dated. Columns: date, task (caulk seam at tub, grout re-seal, fan airflow test), result (pass, fail, replaced), cost, and the name of who did the work.
- Photo on every entry. A phone photo of the seam or joint you worked on, saved in a dedicated folder. The photo is what makes the log credible.
- Keep the receipts. A $9 receipt for a tube of silicone is proof of maintenance when a warranty claim comes up on a joint that failed. The 365-Day Done Right Promise stands behind our workmanship, and documented homeowner maintenance keeps the record clean on both sides.
- Store it with the signed change orders. Every Rowan bathroom remodel comes with a written scope, a written price, and a signed change order for any modification. Keep the maintenance log with that folder. Future contractors will treat a documented record of a well-maintained bathroom as a signal that the rest of the property is well kept, and pricing tends to reflect that.
Year Two and Beyond: The Long-Term Cycle
After the first 12 months, the schedule simplifies. The bathroom has settled, the seams that are going to fail have failed, and you’re on a predictable rotation. Compress it to two events per year:
- Every 6 months: Caulk seams inspection, exhaust fan grille cleaning, supply line visual check, GFCI test.
- Every 12 months: Grout re-seal (cement-based), valve and supply line full inspection, exhaust fan airflow test, grout joint inspection.
- Every 3 – 5 years: Full re-caulk of all silicone joints.
- Every 5 – 8 years: Replace braided supply lines proactively, even if they look fine.
- Every 15 – 20 years: Consider a re-grout of the shower floor, and plan for a valve cartridge replacement on shower and tub fixtures.
If you’re planning additional projects in the same year, our Home Additions & ADU in Glendale page covers how we stage overlapping scopes so a bathroom valve inspection isn’t competing with a foundation pour for the crew’s attention. And when the exterior of the property needs work at the same time, our Driveway & Pavers in Glendale guide explains what Belgard and Techo-Bloc installations need on their own maintenance cycle.
Common Mistakes to Avoid
- Waiting for visible water damage before replacing caulk. By the time a brown line appears on the tub surround, the substrate behind the tile has been wet for months. Caulk is a $12 problem in month 3 and a $3,000 problem in month 18.
- Using silicone on top of old silicone. New bead over failed bead fails within six months. Old sealant gets cut out entirely, the seam is cleaned with denatured alcohol, and the new bead goes on dry substrate.
- Skipping the exhaust fan because “it still runs.” A fan can run at 20 CFM for years without failing. Running isn’t the same as moving air, and only the tissue test tells you the difference. In Glendale, where many older homes have fans retrofit into interior walls, we see undersized ducting more often than failed motors.
- Assuming corrosion is normal aging. Green or white crust on a valve body is a specific warning sign, not the ordinary wear of a brass fitting. Have it inspected the next time a plumber is out.
- Re-grouting before re-sealing. Re-grouting costs $800 – $2,500 for a shower. Re-sealing costs $80 – $200. Seal first, and only re-grout when the joint has actually failed.
- Ignoring the drain seal. The seal around the shower drain is the second-most common leak source after the tub seam. The caulk around it should be part of every 6-month inspection.
- Not keeping a log. Without dates and photos, a warranty dispute on a failed joint becomes a he-said-she-said. A dated maintenance log with pictures is the difference between a covered repair and a full out-of-pocket job.
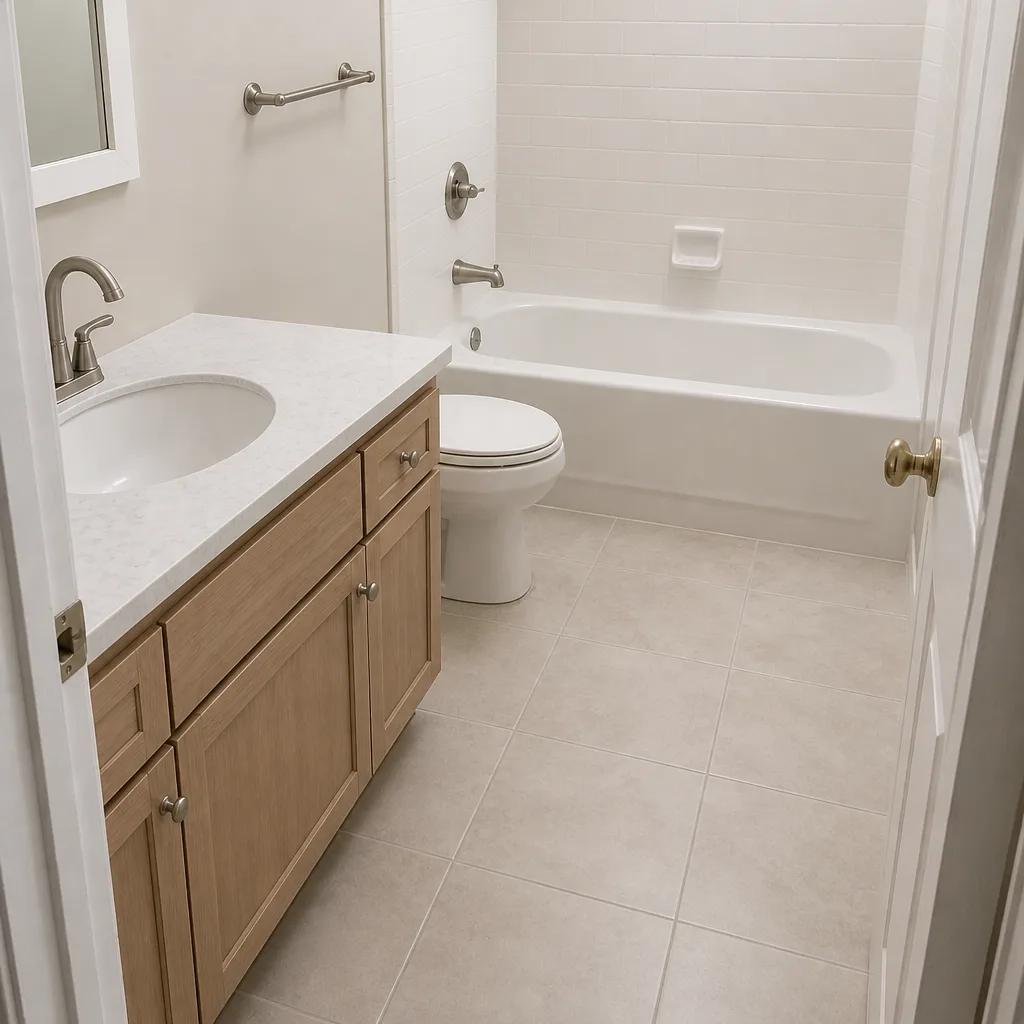
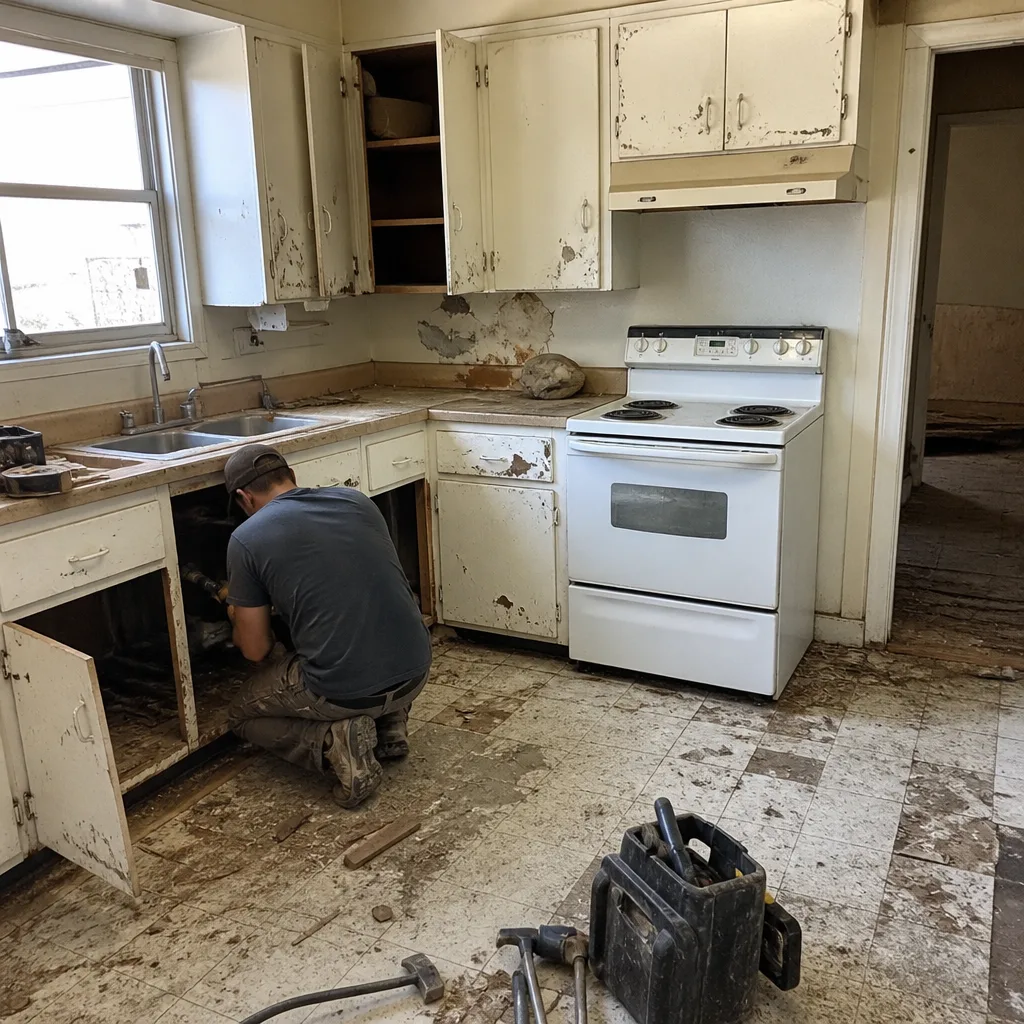
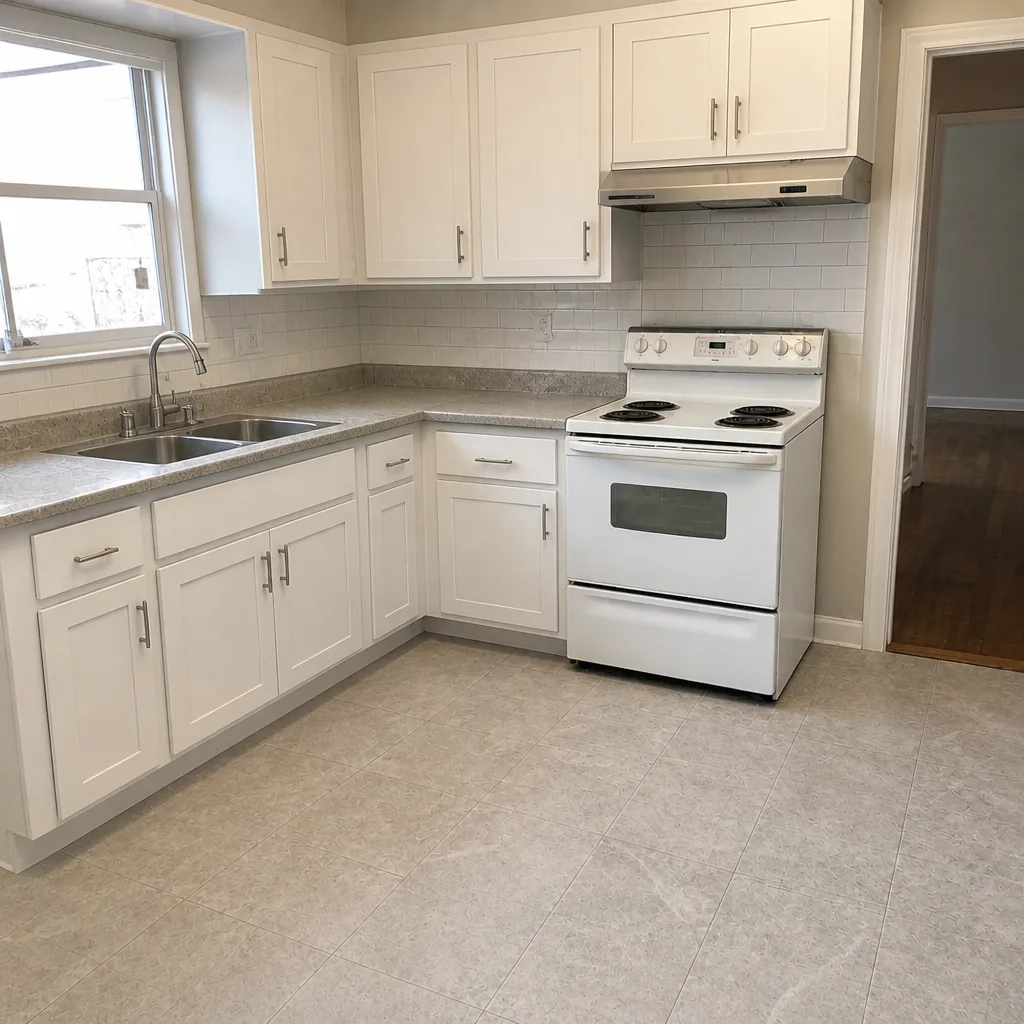
See the difference
 Before
 After
 Before
 After
 Before
 After
When to Call a Professional
Some maintenance is a homeowner’s 20-minute Saturday task. Some of it isn’t. Call a licensed contractor or plumber when you see any of the following: a slow drip behind a wall or under a sink that recurs after tightening; a soft or spongy feeling in floor tile near the drain; a grout line that has cracked through the full depth of the joint; corrosion on the valve body at a fixture connection; a fan that fails the tissue test after cleaning and where the duct routing is unclear; or caulk that fails within 30 days of a fresh re-caulk. Also call if you’re within 30 days of a bathroom remodel completion and any seam is lifting; that’s a workmanship issue and should be handled under warranty. Rowan Construction Group Glendale offers free estimates on any repair or inspection that isn’t covered, and we’ll review a competitor’s written quote line by line at no cost if you want a second opinion before committing. Call (844) 320-5930.
Frequently Asked Questions
Re-caulk a shower every 3 – 5 years for 100% silicone joints, and inspect every 6 months. Replace a seam sooner if it lifts when pressed, cracks, or shows black discoloration. If you use a latex or acrylic caulk at the shower seam instead of silicone, cut that interval to 2 – 3 years.
Re-caulk first if the caulk seams have failed, and re-seal grout before ever re-grouting. Re-caulking costs $12 – $30 in materials for a DIY job and prevents water from reaching the grout joints in the first place. Re-grouting costs $800 – $2,500 for a shower and should only be done once the joint has genuinely failed.
Use the single-tissue test. Turn the fan on, wait two minutes, hold a square of toilet paper flat against the grille, and release. If the fan holds the paper for five seconds or more, airflow is adequate. If it drops in under two seconds, airflow is weak, and you should clean the grille and blades and check the duct damper before considering replacement.
Yes, mainly for timing. Santa Ana wind events in fall and winter drop indoor humidity to 15 – 20% and crack cement grout and open seams. We recommend scheduling the annual grout re-seal in September or early October in Glendale, before those dry events, rather than in spring. Homes against the Verdugo foothills see more severe temperature cycling and benefit from a continuous-operation fan.
Ignoring a slow supply-line leak. A braided stainless line that fails under a sink can dump 30 gallons overnight, and the repair typically runs $1,500 – $4,000 once drywall and flooring are involved. Replacing the braided lines every 5 – 8 years proactively costs $15 – $40 per line in materials and is the cheapest insurance in the schedule.
Yes. A dated log with photos and receipts is the documentation a workmanship warranty claim depends on. Under the 365-Day Done Right Promise, any failure of our work within the first year is corrected regardless, but documented maintenance protects you beyond year one and helps a future contractor price any repair accurately. Call (844) 320-5930 for a free estimate on any bathroom repair or follow-up inspection.
The Bottom Line
A bathroom remodel lives or dies in the first 24 months, and the schedule that keeps it healthy is three lines long: seal grout once a year, replace silicone caulk every 3 – 5 years, and test the exhaust fan and inspect supply lines every 6 months. Everything in this guide supports those three habits. The specific timing shifts in Glendale because of the Santa Ana dry cycles, so plan grout re-sealing for early fall and use a continuous-operation fan in foothill neighborhoods. Log every task with a photo and a date, and store the log with your signed change orders. When something looks wrong and the diagnosis isn’t obvious, get a documented inspection before the repair gets bigger. The cheapest maintenance is the kind you do before the water damage shows up.
For a free estimate on a bathroom repair, follow-up inspection, or full remodel, call Rowan Construction Group Glendale at (844) 320-5930. A written price comes before any work starts, no change proceeds without a signed change order, and every result comes with a documented photo record.
Written by the team at Rowan Construction Group Glendale.