Last updated November 16, 2026
Free written scope consultation - allowances, timeline, and change-order rules on paper before a single trade is scheduled
Driveway & Pavers Maintenance Schedule: What to Do and When
A paver driveway is four systems stacked on top of each other: the structural base, the bedding sand, the joint sand, and the surface sealer. Each one wears out on its own clock. The base settles over years. Bedding sand migrates slowly. Joint sand washes out in months. Sealer degrades on a three-to-five-year arc, not annually. Seal every spring and you’ll spend money trapping moisture under a film that peels by August. Skip joint sand for two years and you’ll be resetting shifted pavers in Glendale after the first hard rain. This guide gives you a month-by-month schedule for Glendale’s climate, the screwdriver test that tells you when to resand, which sealer belongs on which surface, and a log template a future contractor can actually read.
Quick Answer
Inspect joint sand every 12 months with a screwdriver depth test; resand when sand sits more than 1/4 inch below the paver top. Seal every 3 to 5 years, never annually, because film-forming sealers trap moisture and peel. Sweep debris after Santa Ana wind events in October, top off joint sand in April before summer heat, and record every task in a written log so the system’s history is readable years later.
Styles & brands we work with
- Kitchen remodeling
- Bathroom remodeling
- Home additions & ADU
- Roofing
- Windows & doors
- Driveway & pavers
- Fence
Table of Contents
- The Four Systems Inside Your Driveway
- Month-by-Month Maintenance Calendar for Glendale
- The Screwdriver Test: When Joint Sand Needs Topping Off
- Choosing a Sealer: Film-Forming vs. Penetrating
- Cleaning Equipment Limits: 1,500 PSI Electric vs. Gas Washers
- Building a Documentation Log
- Common Mistakes to Avoid
- Frequently Asked Questions
The Four Systems Inside Your Driveway
Most homeowners think of a paver driveway as one object: the pavers. Contractors think of it as four layers, seven or eight inches deep on a typical residential install, and the layer at the bottom is the one doing most of the work. The driveway and pavers service in Glendale we quote starts with 4 to 6 inches of compacted aggregate base under 1 inch of bedding sand. The pavers sit on top, the joint sand fills the 2 to 4 millimeter gaps between them, and the sealer, if you choose one, goes on the surface last. Here’s what each layer does and how fast it fails:
- Structural base (4 to 6 inches of compacted aggregate): Carries the load. Fails over 10 to 20 years if drainage is wrong or the subgrade was never compacted. Sedans don’t stress it. A dumpster delivery or a loaded box truck parked in July heat might.
- Bedding sand (about 1 inch): Levels the pavers and lets them flex as the ground moves. Migrates slowly, particularly at the driveway apron where water flows across it. Rarely needs replacement outside of a full reset.
- Joint sand: Locks the pavers together and stops water from running straight into the bedding layer. Washes out with rain, irrigation overspray, and pressure washing. Needs inspection every 12 months in Glendale’s climate and topping off every 1 to 3 years.
- Surface sealer: Blocks water and UV, stabilizes the joint sand, and deepens the paver color. Film-forming sealers last 2 to 4 years. Penetrating sealers last 3 to 5 years. Both fail on a predictable schedule.
The mistake behind most over-maintenance and most neglect is treating these as one item. In Glendale we see driveways that get sealed every spring by a well-meaning homeowner, joint sand that hasn’t been touched in four years, and a base that’s starting to settle at the apron because the downspout dumps onto it. The sealer is the only layer anyone’s paying attention to. It’s the least important one.
Month-by-Month Maintenance Calendar for Glendale
Glendale is not Los Angeles and not the Valley. It sits in a foothill band with 15 to 20 inches of winter rain, dry summers that hit 95 to 105°F in August, and the Santa Ana wind pattern that funnels dry, debris-heavy air through the Verdugo Wash corridor each October. That seasonal rhythm drives the maintenance calendar. Here’s what we tell homeowners to schedule, month by month:
- January – March (rainy season): Walk the driveway after every significant storm. Check the driveway apron and the low corner where water pools. Rake leaves and seed pods out of the drainage swales so water doesn’t pond on the pavers. Ponding is the single fastest way to lose joint sand and undermine the bedding layer.
- April (before heat): This is the top-off window. Once soil temps and ambient temps climb past 85°F, joint sand sets unevenly and doesn’t compact properly. Resand in April if the screwdriver test (below) says you need to. In Glendale’s foothill neighborhoods like Adams Hill and Chevy Chase, spring is also when you’ll see the first small settlement cracks in the joints after winter rain.
- May – June: If a seal coat is due on its 3 to 5-year cycle, this is the window. The paver surface is dry, ambient temperatures support proper curing, and there’s a full summer ahead before the next rain. Avoid sealing past mid-June in Glendale, where afternoon heat on a west-facing driveway can flash-cure a film sealer unevenly.
- July – September (peak heat): Inspect only. Don’t pressure wash, don’t seal, don’t resand. Heat makes fresh joint sand crack and film sealers blister. Watch for paver movement in the sun-exposed sections and note it in your log.
- October (post-Santa Ana): The debris clearing window. Santa Ana wind events push ash, palm fronds, eucalyptus branches, and fine grit through the Foothill Boulevard and Glenoaks corridors. Clear the driveway and gutters. Fine grit is abrasive underfoot and gets driven into the joints; sweep it out before it becomes part of the joint sand.
- November – December: Pre-rain season inspection. Check the screwdriver test again, confirm drainage, and clean out any leaf litter that will dam water against the driveway edge.
Total time commitment for a 400 square foot driveway in a normal year: about 4 hours, spread across five visits. It’s not the volume of work that keeps a driveway healthy. It’s hitting the right task in the right month.
The Screwdriver Test: When Joint Sand Needs Topping Off
You don’t need a contractor to tell you whether your joint sand is low. You need a flathead screwdriver and 10 minutes. Here’s the test we use on every drive we’re called out to inspect in Glendale:
- Pick 8 to 10 joints at random, including two at the driveway apron (the transition to the street), two along the high-traffic center where tires actually roll, and two at the base of any slope or ramp.
- Press a flathead screwdriver straight down into the joint sand until it stops against the paver base under the sand. Don’t twist. Just press.
- Measure from the top of the paver surface down to the top of the joint sand. If the sand is more than 1/4 inch below the top of the paver, the joint needs sand. If it’s flush or barely below, it’s fine.
- Check for softness. Sand that gives way like loose powder has lost its compaction and needs replacing, not just topping off. Sand that holds firm is doing its job.
- Look at the joint after a rain. If water disappears into the joint within a minute and leaves a visible void, that’s a failed joint. Standing water on top of a joint means it’s still sealed and fine.
The 1/4-inch threshold is not decorative. Below that depth, joint sand loses contact with the paver shoulder and stops locking the pavers against lateral movement. Once that contact is gone, the pavers begin to creep, and creeping in a driveway under vehicle load compounds. A screwdriver test in April catches the problem before summer traffic makes it worse.
Choosing a Sealer: Film-Forming vs. Penetrating
There are two families of paver sealer, and choosing the wrong one for your surface is how you end up with peeling film and a bill for stripping. Each has a place, and neither is universally correct.
Film-forming sealers sit on top of the pavers and cure into a thin acrylic or polyurethane coating. They darken the color, give the surface a wet look, and stabilize joint sand effectively. Products like Techniseal’s film-forming lineup and Alliance Gator’s Gator Seal fall here. Film sealers work well on clay brick pavers with a dense, closed surface, where adhesion is strong. They fail badly on concrete pavers that are still curing, on pavers with efflorescence (the white mineral bloom), and on any surface that’s damp when the sealer goes down. That trapped moisture wants out. When it exits, it takes the film with it, and you’re looking at a peeling, cloudy surface by the following summer.
Penetrating sealers soak into the paver and cure inside the pore structure. They don’t darken the surface much, don’t film, and can’t peel because there’s no coat to peel. They last 3 to 5 years, and they’re the safer choice for concrete pavers, for any paver with surface texture that would trap uneven film, and for homeowners who want the pavers to keep their natural color. They don’t stabilize joint sand as aggressively as a film sealer, which is why joint sand discipline matters more on a penetrating-sealed driveway.
Regardless of which you choose, the prep work decides the outcome. The surface has to be clean, dry, and fully cured. That’s a one-hour heat test with a moisture meter, or in our experience a visual check plus 72 hours of clear weather at 65°F or above. In Glendale, that window is easiest to hit in May. Sealers that go down over a damp surface fail regardless of which product is on the label.
Cleaning Equipment Limits: 1,500 PSI Electric vs. Gas Washers
Pressure washing is the maintenance task most likely to do more harm than good on a paver driveway. The limit isn’t the paver. It’s the joint sand. A properly filled joint sits a fraction of an inch below the paver top. A pressure washer aimed at that gap at too close a range or too high a pressure will evacuate the joint in seconds.
A 1,500 PSI electric pressure washer is the ceiling for routine cleaning. With a 25-degree or 40-degree nozzle held 12 to 18 inches off the surface, it strips dirt, tire marks, and light biological growth without pulling joint sand. Use it once or twice a year, in spring and October, right before the resand or debris-clear windows above.
A gas pressure washer at 2,500 PSI or above will strip joint sand. Full stop. Even at the correct distance, at that pressure the water penetrates the joints and drives sand out before the surface has time to shed. We’ve seen 3-year-old driveways in Glendale that lost most of their joint sand in a single weekend of aggressive gas washing. If a gas unit is the only option, stay on the lowest setting, use a wide fan nozzle, and plan to resand immediately afterward.
Avoid the turbo tip entirely. Avoid any surface cleaner with rotating jets on poly sand joints. Avoid pressure washing in the two days after rain while the surface is still damp. If you’re going to pressure wash, plan a resand for the same week. It’s cheaper than discovering missing joint sand a year later.
Building a Documentation Log
A driveway paver system that’s been maintained for 10 years looks identical to one that’s been ignored, until somebody gets down and inspects it. A written log closes that gap. If the next contractor who shows up has to guess whether the driveway was sealed in 2023 or 2024, whether the joint sand was topped off last spring, or whether the base settled in the corner last winter, they’ll guess wrong and quote work you don’t need.
The log doesn’t have to be complicated. A page in a notebook or a note on your phone works. Here’s what to record after every maintenance visit:
- Date and the task performed (swept, resand, pressure wash, seal, inspection, repair).
- Weather at time of work. Temperature, dry or damp, days since last rain. This is the single most useful line for diagnosing a failed sealant later.
- Screwdriver test results. Depth reading at each of the 8 to 10 test joints. “1/4 inch below top” is a record. “Low” is a memory.
- Product name and quantity. If you resealed, what sealer, how many coats, and what coverage rate. This tells the next applicator (or you, in 4 years) whether a compatible product can go over it.
- Photographs. One wide shot of the driveway and one close-up of the lowest corner and the apron. This is how a settling problem shows its timeline.
- Observations of movement or damage. “Paver at apron back left corner, 1/8 inch lip vs. neighbors, noticed after rain on March 12” is a record. “Looks fine” is a memory.
Under the Haven Standard, every Rowan Construction Group visit includes a documented photo record as a standard deliverable, not an upgrade. We bring the same discipline to a $400 maintenance call as to a $40,000 driveway install. A written record is the difference between maintenance and guessing.
Common Mistakes to Avoid
- Sealing every year. Film-forming sealers need 2 to 4 years between coats. Sealing annually traps moisture that turns into peeling film and a strip-and-recoat job the next spring. That’s $600 to $1,200 in Glendale for a 400 square foot driveway, easily avoided.
- Never inspecting joint sand. This is the more expensive failure. Losing joint sand leads to paver creep, then a reset. A reset on 400 square feet runs $1,800 to $3,500. Resanding a full driveway runs $150 to $350. The math is not close.
- Power-washing with a gas unit at high pressure. Spending two hours on a Saturday with a 2,800 PSI gas washer is the fastest way to strip out joint sand that took the original installer an afternoon to pack. The hose is not a substitute for judgment.
- Sealing over a damp paver surface. Glendale’s winter rain sits in the base layers for days. Sealers applied in February after a wet week trap moisture and fail by June. Wait for the May window.
- Ignoring the driveway apron. The apron – the 12 to 18 inches where the driveway meets the street – is where water exits the system. If it’s settling, the entire driveway is being undermined at its discharge point. We see this on older driveways in Glendale’s Hillhurst and Rossmoyne pockets, where the street grade drops.
- Letting downspouts and irrigation overspray hit the paver surface. A downspout aimed at the driveway edge will erode the joint sand and undermine the bedding layer in a single rainy season. This is a $20 fix to redirect the downspout and a $2,000 fix if you don’t.
- No written record. If you can’t tell your next contractor (or the next owner of your house) when the driveway was last sealed, they’ll assume it hasn’t been. That’s a $600 to $1,200 re-seal you may not need.
See the difference
 Before
 After
 Before
 After
 Before
 After
When to Call a Professional
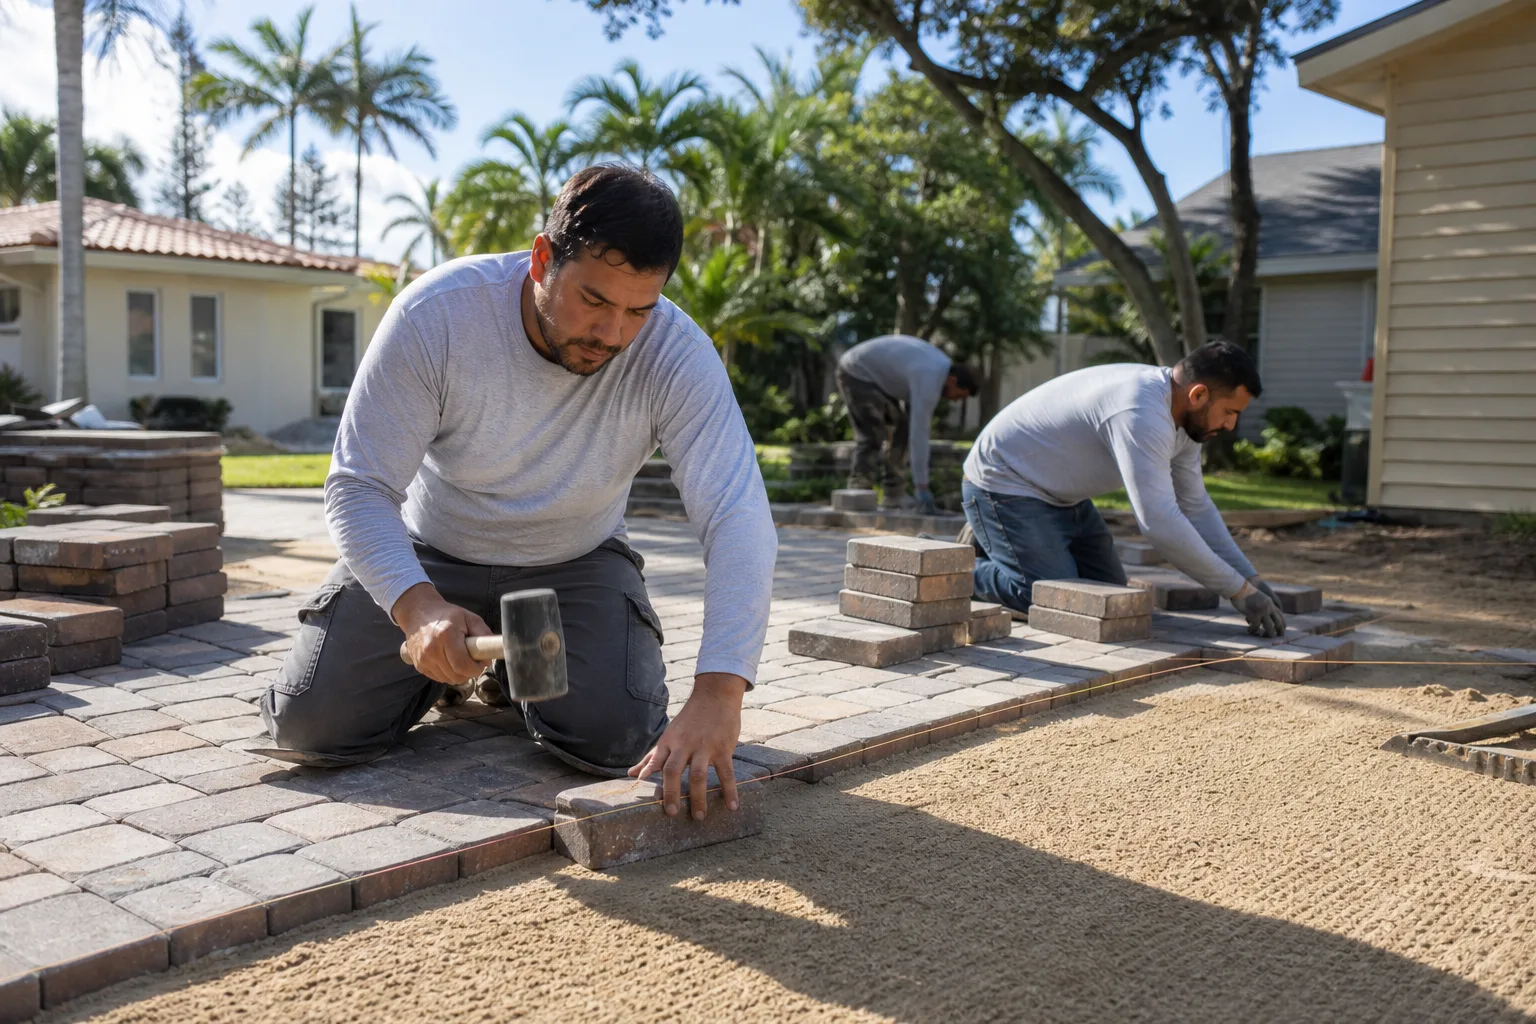
Most paver driveway maintenance you can handle yourself: the sweeping, the screwdriver test, the log entries, the downspout redirect. There are four conditions where it makes sense to call a professional, and one of them is urgent:
- A paver is rocking underfoot. Movement means the bedding layer under that paver is gone. Continuing to drive on it grinds the paver edge into the base and makes the repair larger. Stop parking on the affected section and call for an inspection.
- Settlement at the apron or along an edge. Base-layer settlement that shows up as a visible dip or lip in the driveway surface needs a base repair, not just a resand. Guessing at this with joint sand makes it worse.
- Efflorescence that keeps returning. The white mineral bloom on the paver surface, when it comes back within weeks of cleaning, indicates moisture moving through the slab or the base from below. That requires a drainage fix, not a cleaning fix.
- Any layer failing under a warranty. If the driveway was installed within the last year and joints are failing, don’t touch it. The installer’s warranty almost certainly covers the work, and your diagnosis matters less than the report your contractor writes.
Rowan Construction Group Glendale offers free estimates in Glendale – call (844) 320-5930 to schedule a driveway inspection. We’ll bring the screwdriver, run the test, photograph what we find, and put a written price on any work before anyone touches a tool. If maintenance is all you need, that’s the number on the page. If a repair is needed, that’s also the number, and it comes with a written scope.
Frequently Asked Questions
Every 3 to 5 years, not every year. Film-forming sealers need to fully wear off before a recoat, and sealing over a partly intact film traps moisture under the new coat. In Glendale’s dry-summer climate, a penetrating sealer on a well-installed driveway will hold up for 4 to 5 years before the surface starts absorbing water again. Test with a splash of water: if it beads, the sealer is still working; if it soaks in and darkens the paver, it’s time. Call (844) 320-5930 for an exact quote on sealing – estimates are free.
Run the screwdriver test. Press a flathead screwdriver straight down into a joint until it stops, and measure how far the sand sits below the paver top. If it’s more than 1/4 inch, the joint needs sand. If it’s flush or barely recessed, it’s fine. Test 8 to 10 joints, including two at the driveway apron, two in the tire path, and two on any slope. Joint sand is the discipline to keep up on. It’s the cheapest maintenance item on the schedule and the one most homeowners skip. Call (844) 320-5930 to schedule a resand – estimates are free.
A 1,500 PSI electric pressure washer with a 25- or 40-degree nozzle held 12 to 18 inches off the surface is safe for routine cleaning. A gas pressure washer at 2,500 PSI or higher will strip joint sand even at correct distance. Avoid turbo tips and don’t pressure wash a wet driveway in the two days after rain. If you plan to pressure wash, plan to resand in the same week. Call (844) 320-5930 if you’d rather have it done with a written scope and a photo record – estimates are free.
No. Paver movement at the apron is usually a base settlement or a drainage problem where the driveway meets the street, and it will spread. Glendale driveways in hillside neighborhoods like Adams Hill and Chevy Chase see this more often than flat-lot neighborhoods because the discharge grade at the street is steeper and water exits faster at the apron. Stop parking heavy vehicles on the affected section and book an inspection. A base repair before the movement spreads is a $400 to $900 job; waiting until the pavers crack and creep is a reset. Call (844) 320-5930 for an exact quote – estimates are free.
A film-forming sealer peels when it was applied over a damp surface, over existing efflorescence, over an already-sealed surface without proper prep, or over concrete pavers that were still curing. The sealer deserves blame less often than the prep. In Glendale, the most common cause is sealing in February or March, within a few days of winter rain, before the base layers have dried. The fix is a strip-and-reseal, not a recoat on top. A qualified applicator should be able to diagnose it from the photo record. Call (844) 320-5930 for a free second opinion on any written estimate – we’ll review a competitor’s quote line by line at no charge.
Yes, but the schedule is different. New installs need their first joint sand top-off in the spring after installation, once the base has had one full rain season to settle. Seal the first time 6 to 12 months after install, not immediately, so the pavers and the bedding sand have cured. If you’re within a warranty, check with the installer before doing anything to the surface – most installation warranties on the paver system require the installer to inspect before repairs are made. Call (844) 320-5930 for a free second opinion if you want an independent read on what’s covered. Estimates are free.
The Bottom Line

Your paver driveway has four systems on four different clocks. The base settles over decades. The bedding sand barely moves. The joint sand washes out in 1 to 3 years and takes the whole system with it if you don’t notice. The sealer wears out on a 3 to 5-year cycle and, if you seal too often, does more harm than good. In Glendale, hit the screwdriver test every April, clear debris after October’s Santa Ana winds, seal on the correct interval in May, and keep a written log with dates, photos, product names, and screwdriver readings. That’s the whole schedule. If any part of it needs a contractor’s hand – a resand, a base repair, a seal – Rowan Construction Group Glendale offers a free estimate, a written price before work begins, and a documented photo record on every visit. Call (844) 320-5930. For broader property work, see our fence installation in Glendale service or explore home additions and ADU projects in Glendale. We’ve delivered 4,000-plus projects since 2007, every one with a written price up front and the 365-Day Done Right Promise backing the work. That same discipline applies to a driveway maintenance call. If it isn’t done right, we make it right. Visit the Rowan Construction Group Glendale home to see the full range of trades we quote.
Written by the team at Rowan Construction Group Glendale.